Post by digimon on Oct 31, 2008 10:42:18 GMT 8
This Post Original Provide By DAVE AKA PSYCHED
VECS DIY KING !
The idea arose after I repeatedly failed to tint the fog-lamps, eventually I decided to venture using fiber-glass, so here are the steps I took.
1. The first step is of course to remove the fog-lamps and prep it for to make a mold.

2. Protect the original lamp using autoclave tape (to prevent damaging the plastic lamp due to caustic substances eg. fiber-glass resin and hardener)
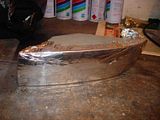

3. Further protect the lamp using a layer of kitchen aluminum foil. The layer of foil will also be useful to remove the mould from the lamp.
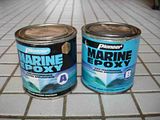
4. I used marine epoxy as my choice to create the mold (because of its less caustic and damaging properties on plastic). ** You may prefer something else

5. With an even mixture of marine epoxy (compound A & B), spread and shape evenly over intended eyelid surface. Use wet hand (using water) to smoothen and mould the epoxy over intended eyelid area and allow to dry once satisfied.
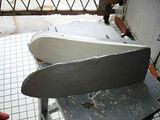
6. Once dry, you may remove the mould as once piece thanks to the layer of aluminum foil applied earlier.
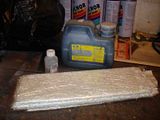
7. Prepare fiber-glass resin, hardener and fiber sheets.

8. Apply aluminum foil over mould (so that ready fiber can be removed easily as one piece; don¡¦t worry, the aluminum foil will not stick to the setting fiber)
9. Cut out fiber sheets to the shape of the intended eyelid for easier manipulation later.
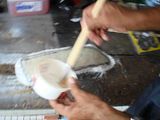
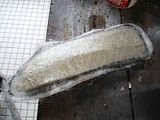
10. Mix a moderate amount of resin with a few drops of hardener (too much hardener will not give you enough time to work before it starts setting).
11. Apply resin-hardener mix using paint brush over fiber sheets (allowing mix to soak through fiber sheet/s).
** do not apply to many fiber sheet layers as it will be as hard as stone and slight imperfections will cause the eyelid to not fit properly; I only used 1 layer (more than enough).
12. Before it hardens, trim of extra fibers around edges using simple household scissors.
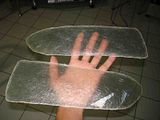
13. Allow fiber-glass to dry and remove from mould and aluminum foil.
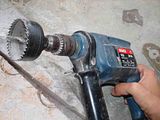
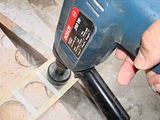

14. Use a hole saw carefully to drill holes into eyelids.
15. Use sandpaper / fine file to shape uneven parts to fit the lamps.


16. Putty „³ Dry „³ Smoothen (sandpaper) : repeat this cycle until all uneven surfaces are covered.
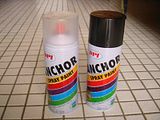
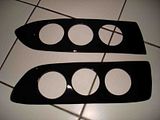
17. You are now ready for spray. Use a clear coat to give it and extra and a more professional shiny look.

18. Apply 3M double sided tape on the rear and you are ready to stick you brand new eyelids on.

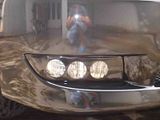


And vuala!!!! ¡K We¡¦re all DONE.
This Post Original Provide By DAVE AKA PSYCHED
VECS DIY KING !
VECS DIY KING !
The idea arose after I repeatedly failed to tint the fog-lamps, eventually I decided to venture using fiber-glass, so here are the steps I took.
1. The first step is of course to remove the fog-lamps and prep it for to make a mold.

2. Protect the original lamp using autoclave tape (to prevent damaging the plastic lamp due to caustic substances eg. fiber-glass resin and hardener)


3. Further protect the lamp using a layer of kitchen aluminum foil. The layer of foil will also be useful to remove the mould from the lamp.

4. I used marine epoxy as my choice to create the mold (because of its less caustic and damaging properties on plastic). ** You may prefer something else

5. With an even mixture of marine epoxy (compound A & B), spread and shape evenly over intended eyelid surface. Use wet hand (using water) to smoothen and mould the epoxy over intended eyelid area and allow to dry once satisfied.

6. Once dry, you may remove the mould as once piece thanks to the layer of aluminum foil applied earlier.

7. Prepare fiber-glass resin, hardener and fiber sheets.

8. Apply aluminum foil over mould (so that ready fiber can be removed easily as one piece; don¡¦t worry, the aluminum foil will not stick to the setting fiber)
9. Cut out fiber sheets to the shape of the intended eyelid for easier manipulation later.


10. Mix a moderate amount of resin with a few drops of hardener (too much hardener will not give you enough time to work before it starts setting).
11. Apply resin-hardener mix using paint brush over fiber sheets (allowing mix to soak through fiber sheet/s).
** do not apply to many fiber sheet layers as it will be as hard as stone and slight imperfections will cause the eyelid to not fit properly; I only used 1 layer (more than enough).
12. Before it hardens, trim of extra fibers around edges using simple household scissors.

13. Allow fiber-glass to dry and remove from mould and aluminum foil.


14. Use a hole saw carefully to drill holes into eyelids.
15. Use sandpaper / fine file to shape uneven parts to fit the lamps.


16. Putty „³ Dry „³ Smoothen (sandpaper) : repeat this cycle until all uneven surfaces are covered.


17. You are now ready for spray. Use a clear coat to give it and extra and a more professional shiny look.

18. Apply 3M double sided tape on the rear and you are ready to stick you brand new eyelids on.


And vuala!!!! ¡K We¡¦re all DONE.
This Post Original Provide By DAVE AKA PSYCHED
VECS DIY KING !


